Archaeo-Tech: Geophysics

Students design a mock archaeological site and simulate a survey using punch holes to represent shovel test pits. They then discuss the limitations of this method and explore how geophysics offers a less destructive way to locate and understand buried sites.
Lesson Created By: MegGaillard
Lesson Partners: South Carolina Department of Natural Resources
Essential Question
How can archaeologists use various survey techniques, like shovel test pits and geophysics, to locate and understand buried archaeological sites while minimizing destruction and maximizing the information they gather about the past?
Grade(s):
- 4
- 6
- 8
- 9
- 10
- 11
- 12
Subject(s):
Recommended Technology:
Other Instructional Materials or Notes:
Materials
• Construction Paper (three sheets per student)
• Markers, crayons, or colored pencils
• Tracing Paper or Tissue Paper (one sheet per student)
• Ruler (one per student)
• Scotch Tape
• Hole Punch or Wooden Skewer (one per student)
Lesson Progression
- Before starting the lesson, have your students read the article from the South Carolina Wildlife magazine about the archaeological excavations at Pockoy Island, a small barrier island off the coast of Edisto Island, linked in the resources section.
- Begin the lesson by discussing the field of archaeology. Refer to the background information linked in the resources section. Explore basic questions, like what is archaeology, what do archaeologists do, and how do archaeologists study the past? Students can use examples from the article to answer these questions.
- As a class, brainstorm how archaeologists find archaeological sites. How do archaeologists know where to dig? There are many ways archaeologists find sites. Some are found by referencing historical documents, like old maps, while others are found by accident. Many sites are found when archaeologists visit a potential site and conduct what is called an archaeological survey.
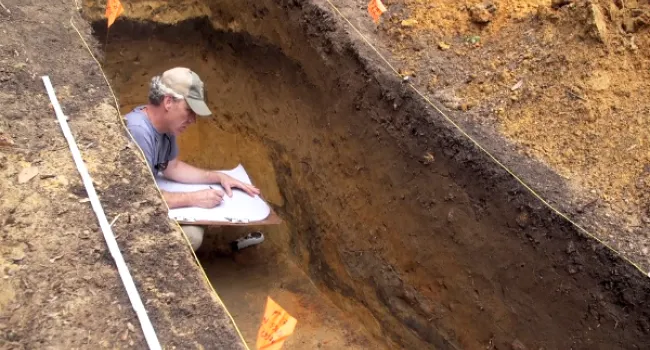
- Explain that in an archaeological survey, archaeologists have a map of the area they are surveying with a grid laid over it. Archaeologists use this map to uniformly plot “shovel test pits”, shovel width holes dug straight into the ground. The dirt from these shovel test pits (STPs) is sifted and artifacts are recorded and collected. Archaeologists make note of which STPs yielded artifacts (positive) and which did not (negative), and they plot the results on the map. Areas with artifact clusters indicate the location of an archaeological site and might be examined further with large scale excavations.
- Distribute the construction paper, tape, markers, and hole punchers. Each student needs three pages of construction paper. Tell your students that they will be simulating an archaeological survey.
- On one piece of construction paper, have your students draw an archaeological site (see example at the end of the lesson plan). Students should use uniform symbols and different colors to indicate artifacts and features. On a second page of construction paper, have your students draw a grid using 1-inch or 2-inch units of measurement. A gridded piece of paper may be prepared beforehand to save class time.
- Using a hole punch or wooden skewer, have your students punch holes where the grid lines intersect. These holes represent “shovel test pits”. Leave the third page of construction paper blank. This page will represent the ground surface.
• Students need to draw their sites from a top-down perspective. Note that the students’ archaeological sites do not need to be accurate to real-life
archaeological sites and encourage students to use their imagination when creating their maps. - Layer the three pages on top of each other so the hole punched gridded page is on top, the blank page is in the middle, and the archaeological site is on the bottom. Use tape to secure the top page to the bottom page by taping the upper left and right corners together but leave the middle page loose. Then, have your students trade their “sites” with each other. The idea is that students should not know what the site looks like prior to “surveying”.
- Students should gently hold the site down on their desks, and slowly slide the blank middle page out from the stack, revealing the archaeological site. Have your students make observations about the site. Explain that large scale excavations are time consuming and expensive, and they only have time to excavate ten units. Based off the information from their “shovel test pits”, what units should they excavate?
- Have your students look at their archaeological sites. Discuss the pros and cons of the shovel test pit survey method. What information did the survey tell you about the site? What did it miss? How effective was it in showing you the full picture of the site or where to excavate? What are some other ways
archaeologists might survey a site? Brainstorm ways archaeologists could survey a site without digging shovel test pits. - Show your class the Archaeo-Tech: Geophysics short film (linked in the resources tab) and answer any questions students might have.
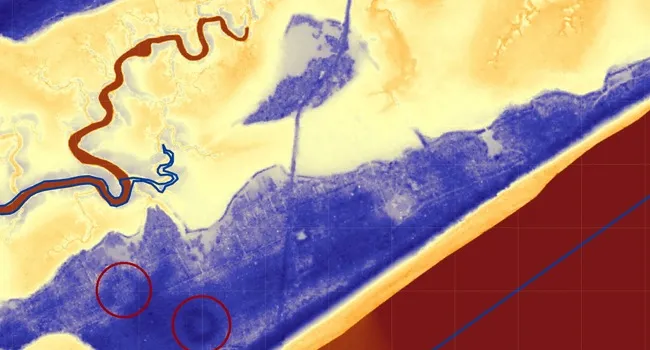
- Using what your students learned in the film, discuss what geophysics is and how it applies to archaeology. Discuss the advantages geophysical surveying has over conventional surveying techniques. Also discuss the disadvantages of geophysical surveying compared to conventional surveying methods.
- Identify the underlying science behind the three geophysical survey methods seen in the film. Radar / electromagnetic waves for ground penetrating radar, electricity for resistance surveys, and magnetic fields for magnetometry. Have your students recall their knowledge of these concepts from previous science classes and apply it to archaeological surveying.
- Distribute sheets of tracing paper (tissue paper cut to the size of the construction paper may also work). Have your students lay the tracing paper over their archaeological sites. Explain that the tracing paper represents geophysical survey techniques. Tell your students that geophysical surveys do not show individual artifacts, but they do show changes in soil composition and buried features. Using a different marker color, have your students trace what would show up in a geophysical survey of their archaeological sites on the tracing paper. Have your students compare this result to the results from the conventional shovel test survey.
- When students are finished with the activity, ask them which survey method is less destructive. Explore why being able to “see” a site before excavating is important to archaeologists.
Teacher Notes
*Wooden skewers can be used in place of hole punchers, but holes made by the skewers will be significantly smaller than holes made by a hole puncher. Wooden skewers may not be appropriate for younger students since they are sharp, and students could accidentally hurt themselves.
differentiation: Create a modified data sheet for struggling students. Instead of a blank grid, provide a pre-drawn grid with designated squares corresponding to the "shovel test pit" locations on their pre-designed site. Each square can have a checkbox or a space to record a simple symbol (e.g., + for artifact, - for no artifact) based on whether the artifact falls within that square.
extension: Students can research the science and application of different geophysical survey techniques for an in-class presentation, either individually or
as a group.
Background Information
Reference as needed for the whole group portion of the lesson. Includes vocabulary terms.
View ResourceArchaeological Site Map Example
Reference of a sample student archaeological site map.
View ResourceGeophysics Video
Discover three types of geophysical surveys used by archaeologists - Ground Penetrating Radar (GPR), Resistance and Gradiometer.
View ResourceArticle About the Archaeological Excavations at Pockoy Island
Article from the South Carolina Wildlife magazine. Have students read this article prior to the start of the lesson to build background knowledge.
View ResourceStandards
- P-PS4-1. Use mathematical representations to support a claim regarding relationships among the frequency, wavelength, and speed of waves traveling in various media.
- 4.1.CO Compare the interactions among cultural groups as a result of European colonization.
- 6.1.CO Compare the development of social systems among the early river valley civilizations.
- 6.1.CC Analyze changes and continuities that influenced the organization and technological advancements of early and classical world civilizations.
- 8.1.CC Analyze the changes and continuities of the Native Americans' experiences prior to and as a result of settlement and colonization.
- This indicator was developed to encourage inquiry into Native American civilizations and cultures prior to European contact and their interactions with Europeans during the period of settlement and colonization, including their efforts to preserve their cultures.
Assessments
Use student responses to the concluding questions as well as their excavation site maps to assess student learning outcomes.