Making a Natural Weaving Workshop
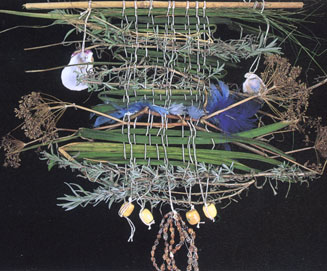
Learn how to use a backstrap loom to make a Natural Weaving using items in nature. See what supplies you will need and then use the navigation at the top to follow the steps.
List of Materials
- Branches for top and bottom of weaving, roughly 6 inches long
- Warp - 32 yards of strong, thin thread in neutral color
- Weft - a variety of materials gathered from nature: twigs, grasses, pine straw, pods or seed heads with stems attached, feathers, Spanish moss, shells, small pine cones, beads, yarn or thread
- A ruler to be used as a shed stick
- Belt or ribbon to fasten warp to waist
- C-clamp or fixed object to tie end of warp to a countertop, table leg or chair
- Scissors
- Masking tape
- Table leg, chair or other sturdy, fixed object
- 11 craft sticks (you may substitute popsicle sticks or tongue depressors, or have any variation thereof - as long as they have equal length)
- Small drill
- Wood glue or stong white glue
Weaver's Vocabulary
- Loom - a frame ( or machine) upon which weaving is done.
- Warp - vertical threads which form the base of a weaving. To "warp" means to string thread onto a loom.
- Weft - the horizontal threads which are woven across the warp. Branches or grasses woven horizontally are also weft.
- Heddle - structure used to guide warp threads in a loom. stick. In these spaces, we can weave grasses, branches or string.
- Selvedge - (selvage) the edge on either side of a woven fabric so finished as to prevent raveling.
- Beat in - to push the new row of weft against the previously woven row.
- Beater - stick, fork or comb used to tightly pack the weft threads.
- Shed - a space created between the warp threads and those lifted by the shed stick.
Construct the Heddle
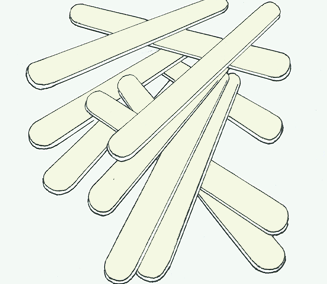
Craft Sticks
Before you can begin the project, you need to construct a heddle. Gather 11 tongue depressors, craft sticks, or popsicle sticks.
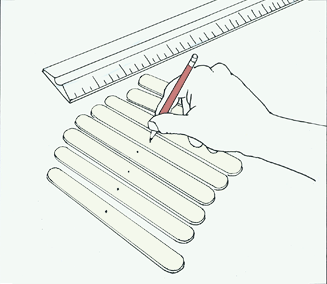
Measurement Placement for Dot
Using a ruler for exact measurement, make a dot in the center of each craft stick. It is important that the dots line up on all the craft sticks.
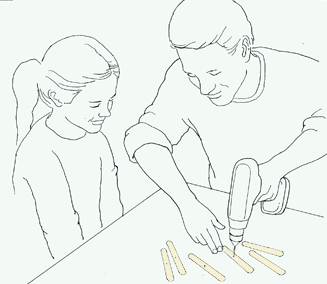
Drilling the Holes
Get an adult to help you drill a 1/8" hole in each craft stick on the center dot.
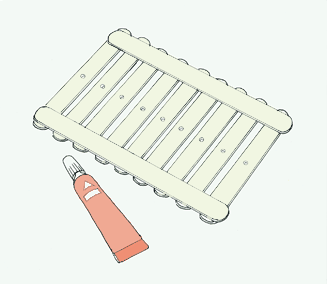
Craft Sticks Glued Together
Lay two of the craft sticks (or tongue depressors or popsicle sticks) horizontally parallel to each other at a distance equal to the length of the craft sticks. Lay the remaining craft sticks vertically across the two horizontal craft sticks so that they are spaced at equal distances. Remember that each should have its drilled center line up between the two horizontal supports. Glue these in place with wood glue or other strong white glue.
Steps 1-4
Step 1
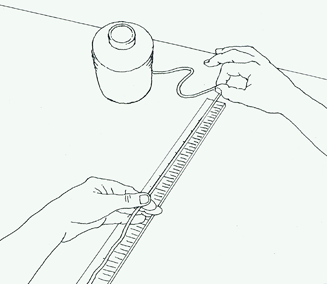
After the heddle has completely dried, measure 8 four yard lengths of warp thread.
Step 2
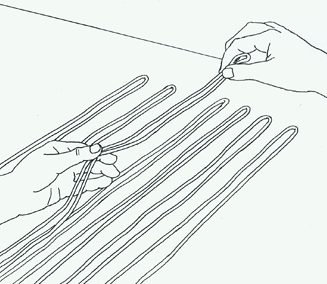
Fold each warp thread in half.
Step 3
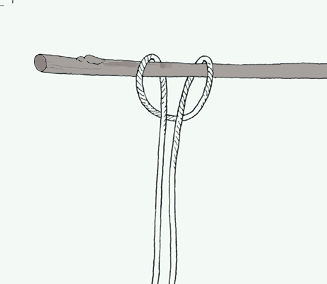
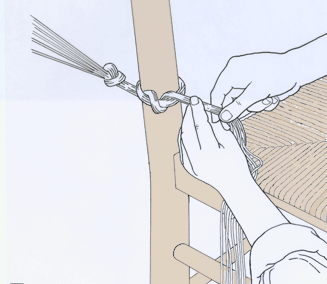
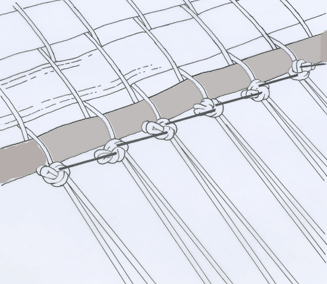
Attach each warp to the 6 inch branch with a lark's head knot so that the thread is perpendicular to the branch.
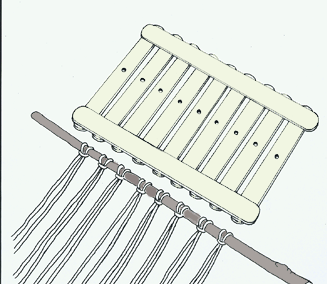
Step 4
Space out the knots so that they are even with the spaces in the heddle holes of the loom.
Steps 5-8
Step 5
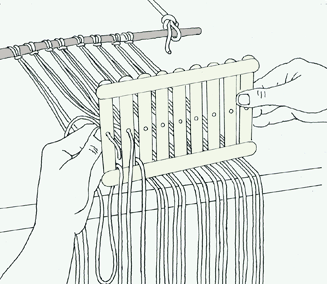
Thread the heddle with the vertical thread ends. Work from the opposite end from the branch. Lace the first vertical thread end through a heddle hole, the next through a space sequentially.

Step 6
Alternate the vertical thread ends through a space or a heddle hole until all thread ends have been inserted. Half of these vertical threads are passed through the holes and the other half are passed through the slots, or spaces, between the craft sticks.
Step 7
Using masking tape, tape the branch onto the table or counter top. Straighten the heddle. When the vertical threads are straight, tie a knot in the end opposite the branch, so that the heddle hangs by the vertical threads in the middle.
Step 8
You should now have at one end of the heddle a branch holding equally spaced threads, secured by lark's head knots. On the opposite end of the heddle, you should have the untangled threads tied in a knot.
Steps 9-15
Step 9
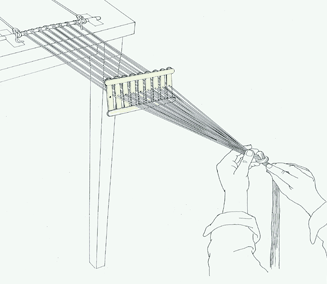
Tie knotted end to a C-clamp, or around a tree, pole or chair.

Step 10
Arrange the other materials that you are using for weft nearby.
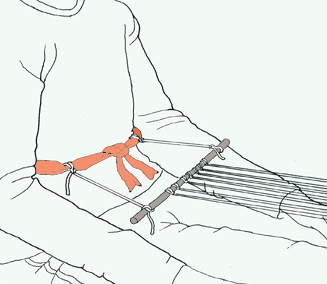
Step 11
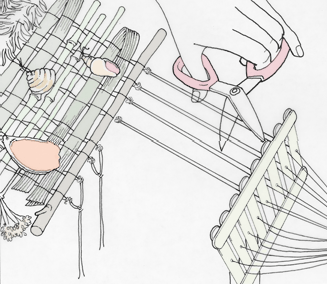
Tie the end containing the branch to the belt or ribbon tied around your waist. You are now part of your loom.
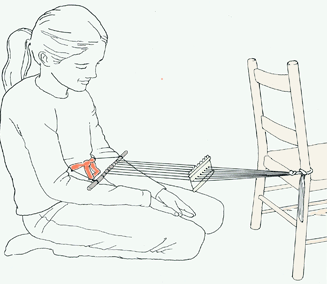
Step 12
Sit on the floor with your back straight, keeping the threads of the loom tight and straight.
Step 13
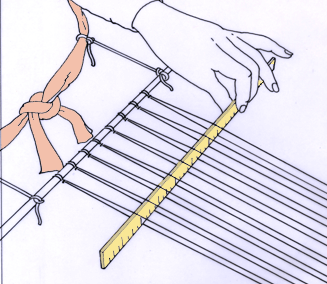
Insert your shed stick to help hoist the warp strings.
Step 14
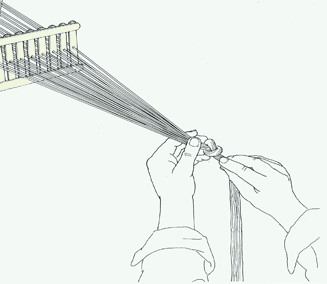
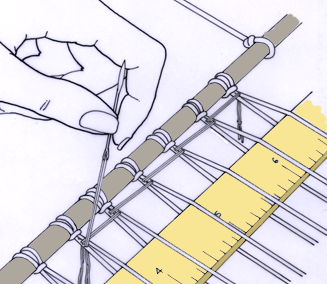
Insert a thread into your needle and insert a back stitch at the beginning warp thread. This stitch will secure the weaving so that it won't unravel.
Step 15
Leave a bubble of loosened thread at the end of the row so that the selvedge, or edge of the weaving, so that it does not pull too tightly. After have you have your first row in place, take the beater and press your horizontal row close to the branch.
Steps 16-23
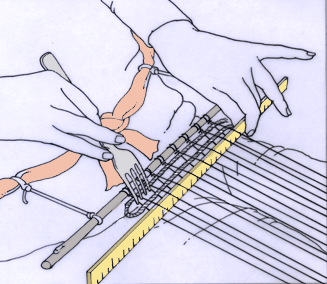
Step 16
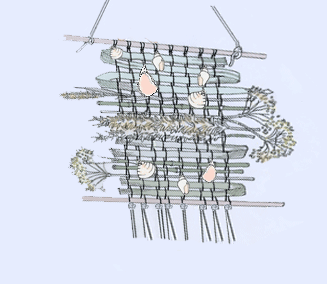
Put in an additional horizontal row of thread and tap it into place. Now you can start weaving grasses and bits of cotton or other natural materials into the natural weave, as well as adding additional rows of string or yarn. Remember that the natural materials (pine straw, grasses, plant stalks) will shrink somewhat as they dry, so pack them together closely.

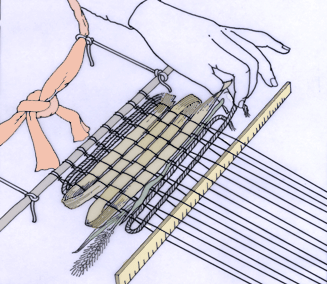
Step 17
Adding rows of string or yarn will help hold the natural items in place in the weaving.
Step 18
When weaving the stalks with attached seed heads, place the seed head or pod at the outer edge of the weaving and then just weave the stalk portion into your wall hanging. When you are happy with the length of the weaving, on the last row, weave in another branch.
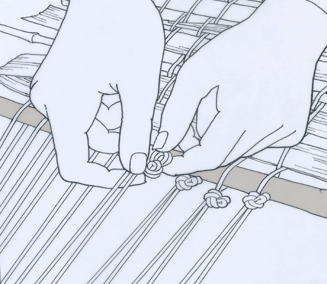
Step 19
Knot the ends of the vertically woven thread close to the last row of weft, which be the ending branch.
Step 20
Before cutting the threads from the branch, go back and add an extra row of backstitching to secure the knots.
Step 21
For further decoration, after backstitching, attach beads, small pinecones or shells using extra string.
Step 22
Untie the far end of the yarn from the c-clamp. Then cut or untie the knot and the end and slide the heddle off the warp.
Step 23
You have just made a wall hanging. Protect your natural wall hanging from fading, don't hang it in sunlight.